Guides
Setting up mandates
Direct Debit Mandates Verified Mandates PayTo Agreements and Payments Build a client to create mandates offline Supporting mandates set up outside of your product Importing Mandates Blocking mandatesRecurring payments
Taking Subscription payments Taking Instalment payments Variable Recurring PaymentsCombining one-off and recurring payments
Take a first Instant Payment with mandate set upSend an outbound payment
Adding a new recipient Initiate an outbound payment Approve an outbound payment Cancel an outbound paymentSetting up mandates / collecting payments
Billing Request with Actions: Setting up a Direct Debit mandate Collecting a Direct Debit payment Billing Request with Actions: Taking an Instant Bank Payment Billing Request with Actions Dual Flow: Taking an Instant Bank Payment and setting up a Direct Debit mandateGoCardless Embed
Setting Up Branding
If you are using the GoCardless Hosted Payment Pages or the Javascript Drop-in, you can customise the look and feel of your merchants’ payment pages and notification emails by adding a logo or setting the colour theme.
How branding is applied to your merchants
All your merchants (represented as creditors in GoCardless) start off without any custom branding.
If you add branding to your primary creditor, the customisation settings will be inherited by all your creditors. This means if you want all your merchants to have the same branding, you only need to configure this once against your primary creditor.
If you add branding to a specific creditor, this will override the primary creditor settings for that creditor. This means if merchant X wants to have their own branding, you can apply it to their creditor and their logo and colour themes will appear to that merchant’s customers only.
How to set up custom branding
Dashboard
To do this in the dashboard and preview what the page will look like:
Navigate to the creditor you want to update
Click `Update branding` in the top right corner
Upload a logo for the creditor
Customise the payment page’s colours
API
To do this using the GoCardless API, you can use the following steps:
POST /branding/logos
You can upload a logo to a creditor by performing a POST request to the /branding/logos endpoint. If a creditor already has a logo, this will update the existing logo linked to the creditor. The required parameters are:
Parameter | Description |
|---|---|
image | Base64 encoded string of the image to be uploaded. Must be in the format Max file size is 0.5MB. |
links[creditor] | ID of the creditor the logo belongs to. |
Examples of how to make this request using the GoCardless client libraries:
1POST https://api.gocardless.com/branding/logos HTTP/1.1
2Content-Type: application/json
3{
4  "logos": {
5    "image": "data:image/png;base64,iVBORw0KGgoAAAANSUhEUgAAABgAAAAYCAYAAADgdz34AAAABmJLR0QA/wD/AP+gvaeTAAAA",
6    "links": {
7      "creditor": "CR123"
8    }
9  }
10}
11
12HTTP/1.1 201 Created
13Content-Type: application/json
14{
15  "logos": {
16    "id": "LO123"
17  }
18}For more details, see the API reference docs for creating logos.
POST /branding/payer_themes
You can add payer colour themes to a creditor’s branding by performing a POST request to the /branding/payer_themes endpoint. If a creditor already has payer themes, this will update the existing payer theme linked to the creditor. The required parameters are:
Parameters | Description |
|---|---|
button_background_colour | The hexcode colour for button background |
content_box_border_colour | The hexcode colour for for content box borders |
header_background_colour | The hexcode colour for the header background |
link_text_colour | The hexcode colour for text links |
links[creditor] | ID of the creditor the payer theme belongs to. |
Examples of how to make this request using the GoCardless client libraries:
1POST https://api.gocardless.com/branding/payer_themes HTTP/1.1
2Content-Type: application/json
3{
4  "payer_themes": {
5    "header_background_colour": "#BD10E0",
6    "link_text_colour": "#7ED321",
7    "button_background_colour": "#128DAA",
8    "content_box_border_colour": "#BD10E0",
9    "links": {
10      "creditor": "CR123"
11    }
12  }
13}
14
15HTTP/1.1 201 Created
16Content-Type: application/json
17{
18  "payer_themes": {
19    "id": "PTH123"
20  }
21}For more details, see the API reference docs for creating payer themes.
Tips for uploading your logo
Here are a few tips to help make your logo looks great across your customer payment page and notification emails.
We support JPG and PNG formats. Your logo will be scaled to a maximum of 300px by 40px.

Rectangular logos display best. Square logos will appear smaller and may be harder for your customers to read.

Crop your logo tightly with minimal extra space to make it appear as large as possible

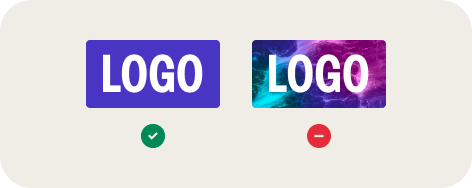
Save your logo on a solid background colour. Avoid using photography or multiple colours within your logo.

Make sure the background colour contrasts well with your logo so your customers can clearly see it.

Avoid unnecessary words and taglines to keep your logo easy to read.

Pro tip: Save your logo as a transparent PNG file. This way, you can easily change the background colour independently.`
