Before your users can receive payouts of the payments they’ve collected, they’ll need to verify their account. As part of the verification process, your users will need to:
- Provide information about their business
- Upload proof of identity and address
- Add their bank account details, and prove they own the account
We collect these details through our dedicated onboarding flow in order to comply with anti-money laundering regulations. Once a user has signed up to GoCardless through your app, you should send them straight to the onboarding flow to provide these details.
In this guide, we’ll show you how to set up the GoCardless client library so you can access our API using your users’ access tokens.
Once that’s set up, we’ll show you how to query your users’ verification status and, if required, how to send them to our onboarding flow. We’ll collect the information we need and then send the user back to your application.
Setting up your client library
To make it quick and easy to interact with the GoCardless API, we maintain libraries in Java, Python, Ruby, PHP, JavaScript and .NET to talk to our API in those languages without writing lots of boilerplate code.
Of course, you can still use our API if we don’t have a library in your language by building the HTTP requests yourself - see our API reference to get started.
Let’s install the API library using a package manager (you can also, if you prefer, download the source yourself from the links above):
# We strongly recommend using Composer, but if you'd prefer to
# install the PHP library manually, see the instructions at
# https://github.com/gocardless/gocardless-pro-php#manual-installation
composer require gocardless/gocardless-pro "~1.1"
pip install gocardless_pro
echo "gem 'gocardless_pro'" >> Gemfile
bundle install
# Add the following to <dependencies> in your pom.xml
<dependency>
<groupId>com.gocardless</groupId>
<artifactId>gocardless-pro</artifactId>
<version>3.10.0</version>
</dependency>
# Install our NPM package:
npm install gocardless-nodejs
# Install our Nuget package:
install-package GoCardless
pro
in their names, but don’t worry: if you’re
starting a new integration, these are the right libraries for you.
Now we can import the library into our code so that it’s ready to use:
require 'vendor/autoload.php';
import gocardless_pro
# In a Rails app, this will happen automatically
require 'gocardless_pro'
import com.gocardless.GoCardlessClient;
const gocardless = require("gocardless-nodejs");
using GoCardless;
You’re now ready to initialise the client - wherever you’re making an API call on behalf of one of your users, you’ll need to pull their GoCardless access token from your database and instantiate the client object with it:
<?php
require 'vendor/autoload.php';
$client = new \GoCardlessPro\Client([
// You'll need to identify the user the current user and fetch their access token
'access_token' => $currentUser->gocardlessAccessToken,
// Change me to LIVE when you're ready to go live
'environment' => \GoCardlessPro\Environment::SANDBOX
]);
import gocardless_pro
from myintegration import current_user
client = gocardless_pro.Client(
# You'll need to identify the user the current user and fetch their access token
access_token=current_user.gocardless_access_token,
# Change this to 'live' when you are ready to go live.
environment='sandbox'
)
require 'gocardless_pro'
client = GoCardlessPro::Client.new(
# You'll need to identify the user the current user and fetch their access token
access_token: current_user.gocardless_access_token,
# Remove the following line when you're ready to go live
environment: :sandbox
)
package com.gcintegration;
import com.gocardless.GoCardlessClient;
GoCardlessClient client = GoCardlessClient.create(
// You'll need to identify the user the current user and fetch their access token
user.gocardlessAccessToken,
// Change me to LIVE when you're ready to go live
GoCardlessClient.Environment.SANDBOX
);
const constants = require("gocardless-nodejs/constants");
const client = gocardless(
// We recommend storing your access token in an environment
// variable for security
process.env.GoCardlessAccessToken,
// Change me to constants.Environments.Live when you're ready to go live
constants.Environments.Sandbox
);
var client = GoCardlessClient.Create(
// We recommend storing your access token in an
// configuration setting for security
ConfigurationManager.AppSettings["GoCardlessAccessToken"],
// Change me to LIVE when you're ready to go live
GoCardlessClient.Environment.SANDBOX
);
Checking a user’s verification status
You’ve just taken your user through the OAuth flow, getting an access token which you can use to manage their account. Now, if appropriate, you should send them to the onboarding flow so we can gather more information about them which we need before they can receive payouts.
Most of your users will have signed up for their GoCardless account in the OAuth flow itself, so they’ll need to get verified. However, some may have connected existing GoCardless accounts, in which case they won’t need to be verified again. To decide what to do, you should query your user’s verification status.
Your user’s verification status is exposed in the Creditors API through the
verification_status
attribute. You can query it like this:
<?php
require 'vendor/autoload.php';
$client = new \GoCardlessPro\Client([
'access_token' => $currentUser->gocardlessAccessToken,
'environment' => \GoCardlessPro\Environment::SANDBOX
]);
// The Creditors API returns a list of creditors, but any GoCardless account connected
// to your application will have a single creditor, so you can just look at the first one
$creditor = $client->creditors()->list()->records[0];
// We'll see below how to redirect users to the onboarding flow, and how it works
if ($creditor->verification_status == "action_required") {
redirectToOnboardingFlow();
}
import gocardless_pro
client = gocardless_pro.Client(
access_token=current_user.gocardless_access_token,
environment='sandbox'
)
# The Creditors API returns a list of creditors, but any GoCardless account connected
# to your application will have a single creditor, so you can just look at the first one
creditor = client.creditors.list().records[0];
# We'll see below how to redirect users to the onboarding flow, and how it works
if creditor.verification_status == "action_required":
redirect_to_onboarding_flow()
require 'gocardless_pro'
client = GoCardlessPro::Client.new(
access_token: current_user.gocardless_access_token,
environment: :sandbox
)
# The Creditors API returns a list of creditors, but any GoCardless account connected
# to your application will have a single creditor, so you can just look at the first one
creditor = client.creditors.list.records.first
# We'll see below how to redirect users to the onboarding flow, and how it works
redirect_to_onboarding_flow if creditor.verification_status == "action_required"
package com.gcintegration;
import com.gocardless.GoCardlessClient;
import com.gocardless.resources.Creditor;
GoCardlessClient client = GoCardlessClient
.newBuilder(CurrentUser.gocardlessAccessToken)
.withEnvironment(GoCardlessClient.Environment.SANDBOX)
.build();
// The Creditors API returns a list of creditors, but any GoCardless account connected
// to your application will have a single creditor, so you can just look at the first one
Creditor creditor = client.creditors().list().execute()[0];
// We'll see below how to redirect users to the onboarding flow, and how it works
if (creditor.getVerificationStatus() == "action_required") {
redirectToOnboardingFlow();
}
const client = gocardless(
// We recommend storing your access token in an environment
// variable for security
process.env.GoCardlessAccessToken,
// Change me to constants.Environments.Live when you're ready to go live
constants.Environments.Sandbox
);
const creditors = gocardless.creditors.list({ limit: 1 });
// The Creditors API returns a list of creditors, but any GoCardless account connected
// to your application will have a single creditor, so you can just look at the first one
const creditor = creditors.creditors[0];
if (creditor.verification_status === "action_required") {
// We'll see below how to redirect users to the onboarding flow, and how it works
redirectUserToOnboardingFlow();
}
GoCardlessClient client = GoCardlessClient.Create(
// We recommend storing your access token in an
// configuration setting for security
ConfigurationManager.AppSettings["GoCardlessAccessToken"],
// Change me to LIVE when you're ready to go live
GoCardlessClient.Environment.SANDBOX
);
var creditorListResponse = await gocardless.Creditors.ListAsync(
new GoCardless.Services.CreditorListRequest() { Limit = 1 }
);
// The Creditors API returns a list of creditors, but any GoCardless account connected
// to your application will have a single creditor, so you can just look at the first one
GoCardless.Resources.Creditor creditor = creditorListResponse.Creditors[0];
if (creditor.VerificationStatus == CreditorVerificationStatus.ActionRequired)
{
// We'll see below how to redirect users to the onboarding flow, and how it works
RedirectUserToOnboardingFlow();
}
A creditor’s verification status can have one of three values:
-
successful
: the creditor’s account is fully verified, and they can receive payouts -
in_review
: the creditor has provided all of the information requested, and it is awaiting review by GoCardless before they can receive payouts -
action_required
: the creditor needs to provide further information to verify their account so they can receive payouts, and should visit the onboarding flow
If your user has just connected to your app and they’re in the action_required
state,
you should send them to the onboarding flow straight away.
It’s worth noting that your users, after being successfully verified, may later require
further verification and go back to the in_review
or action_required
states. For
example, if your user changes the bank account where they receive payouts, we’ll need to
check that the new bank account belongs to them before they can receive payouts, so
they’ll revert to the action_required
state.
We’d suggest including appropriate cues in your UI if your users aren’t in the
successful
state, letting them know that they won’t receive payouts, and directing them
to the onboarding flow if they’re in the action_required
state.
verification_status
. We'd recommend caching this and refreshing it
regularly, as well as at times when it makes sense in your user journey (for example
when a user returns to your app through the post-onboarding URL).
Sending your user to the onboarding flow
GoCardless provides a dedicated onboarding flow where you can send your users to go through the verification process.
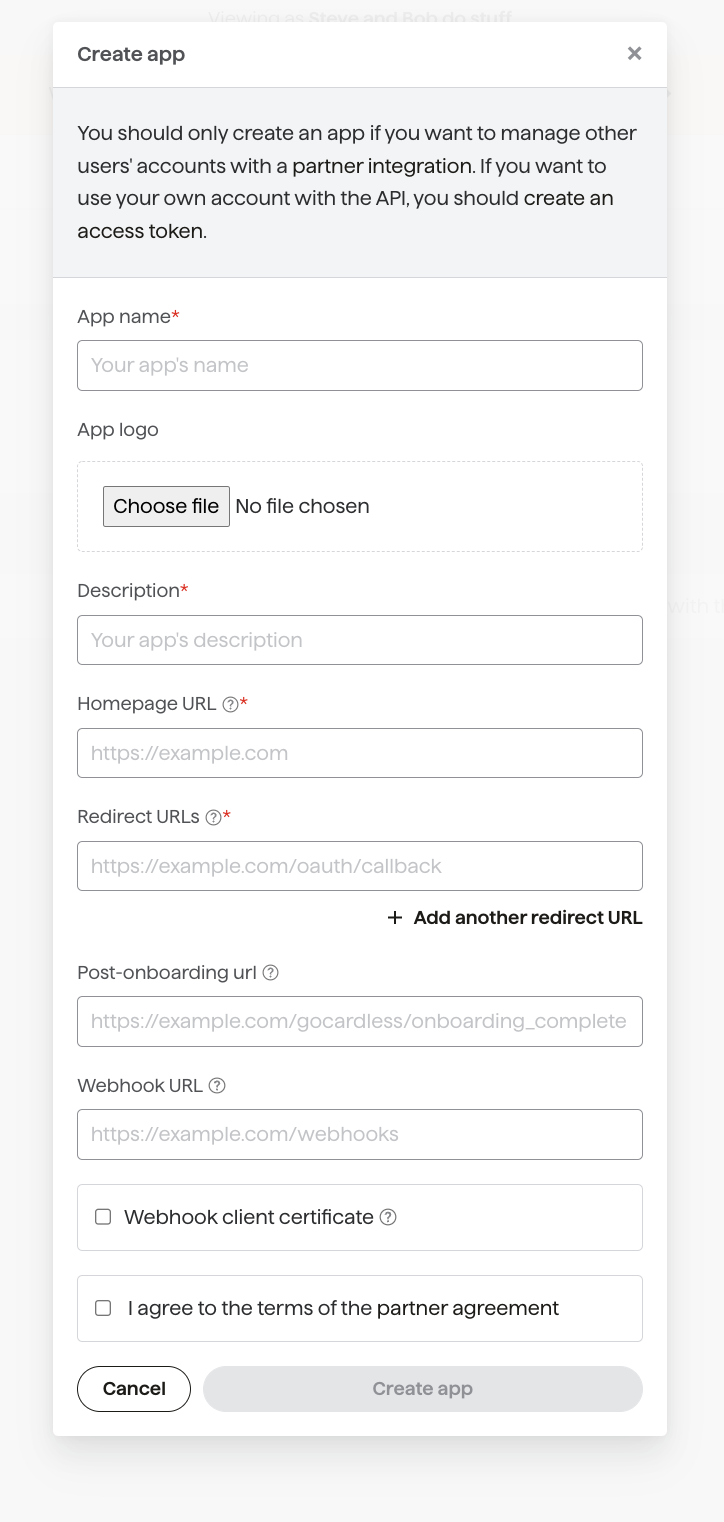
Once they’ve finished providing the information required, the UI will link your user directly back to your product, using the “Post-onboarding URL” specified on your app.
To start the onboarding and verification process, send your user to:
When your user lands back in your product, it’s likely that their verification status
will not yet be successful
- some of the information provided by users requires
review by GoCardless, so it may be a little while before they move to the successful
state, or in some cases further information will be requested, meaning they’ll move back
to action_required.